
I stumbled upon the recipe for Reka bread. Its deep roots and comforting essence immediately drew me in. Originating from Eastern Europe, the reka bread recipe symbolizes comfort and tradition. I baked it in my tiny kitchen for the first time. The aroma filled the air, transporting me to my grandmother’s home, where fresh bread scent lingered.
In This Post
- Ingredients for Reka Bread Recipe
- Step-by-Step Instructions for Making Reka Bread Recipe
- Tips for Perfecting Your Reka Bread
- Try These Tasty Bread Recipes
- Variations and Additions to the Reka Bread Recipe
- Serving Suggestions for Reka Bread Recipe
- Common Mistakes To Avoid And Their Solutions
- Testimonials and Reviews of the Reka Bread Recipe
- Conclusion
- FAQs
- The recipe📖
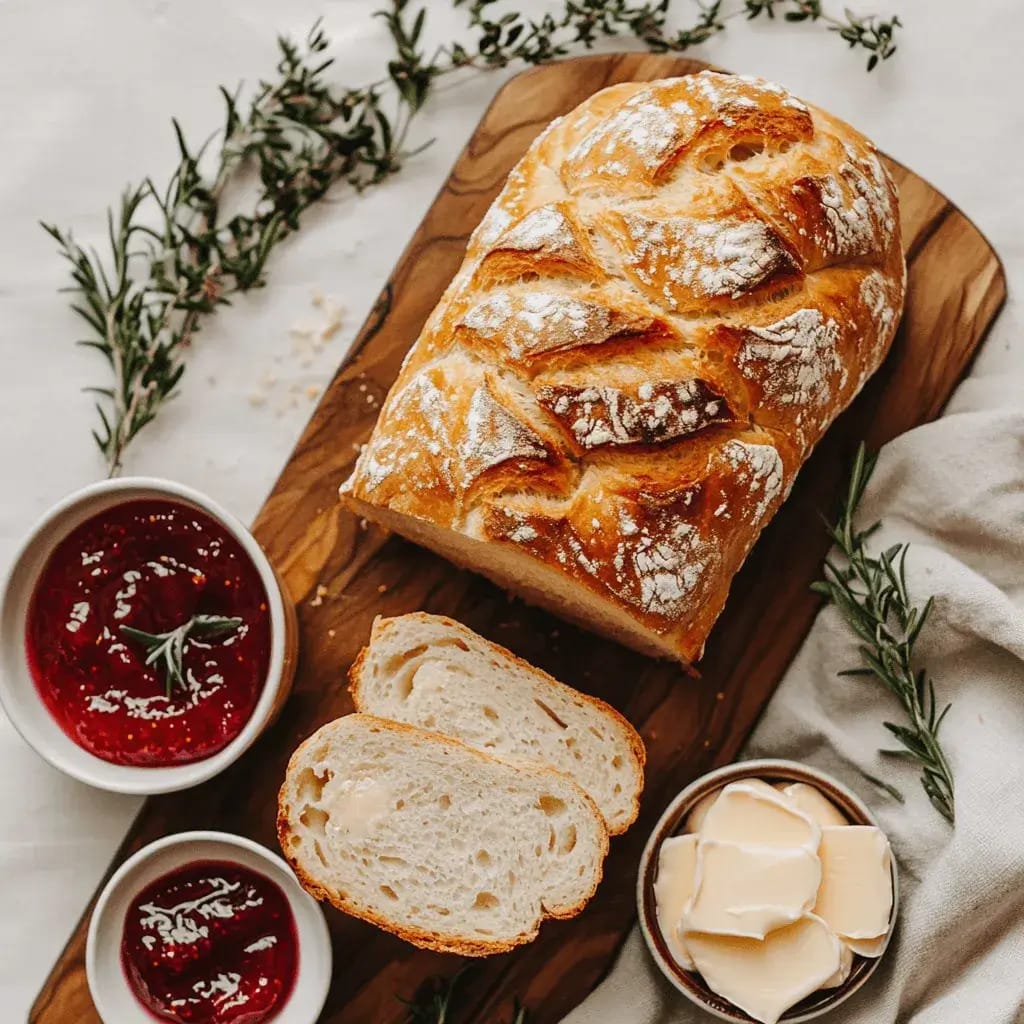
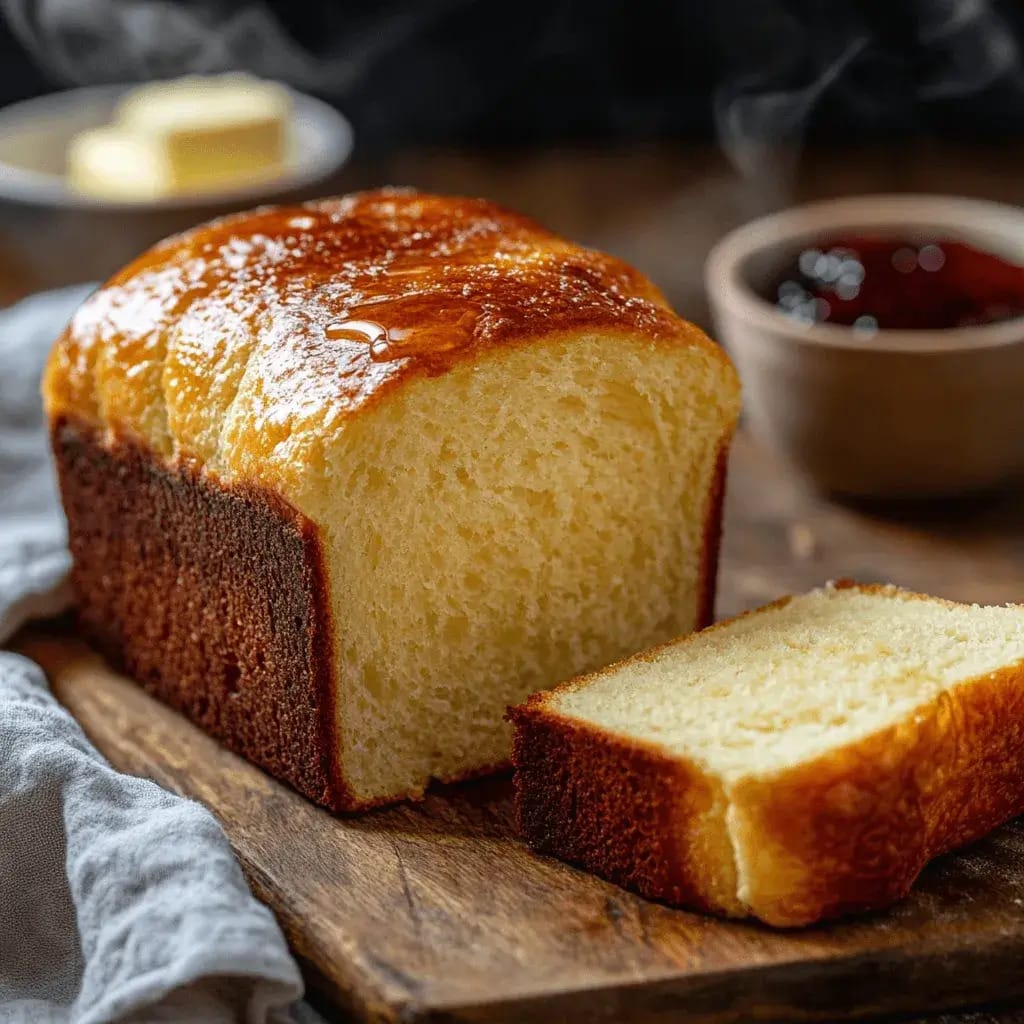
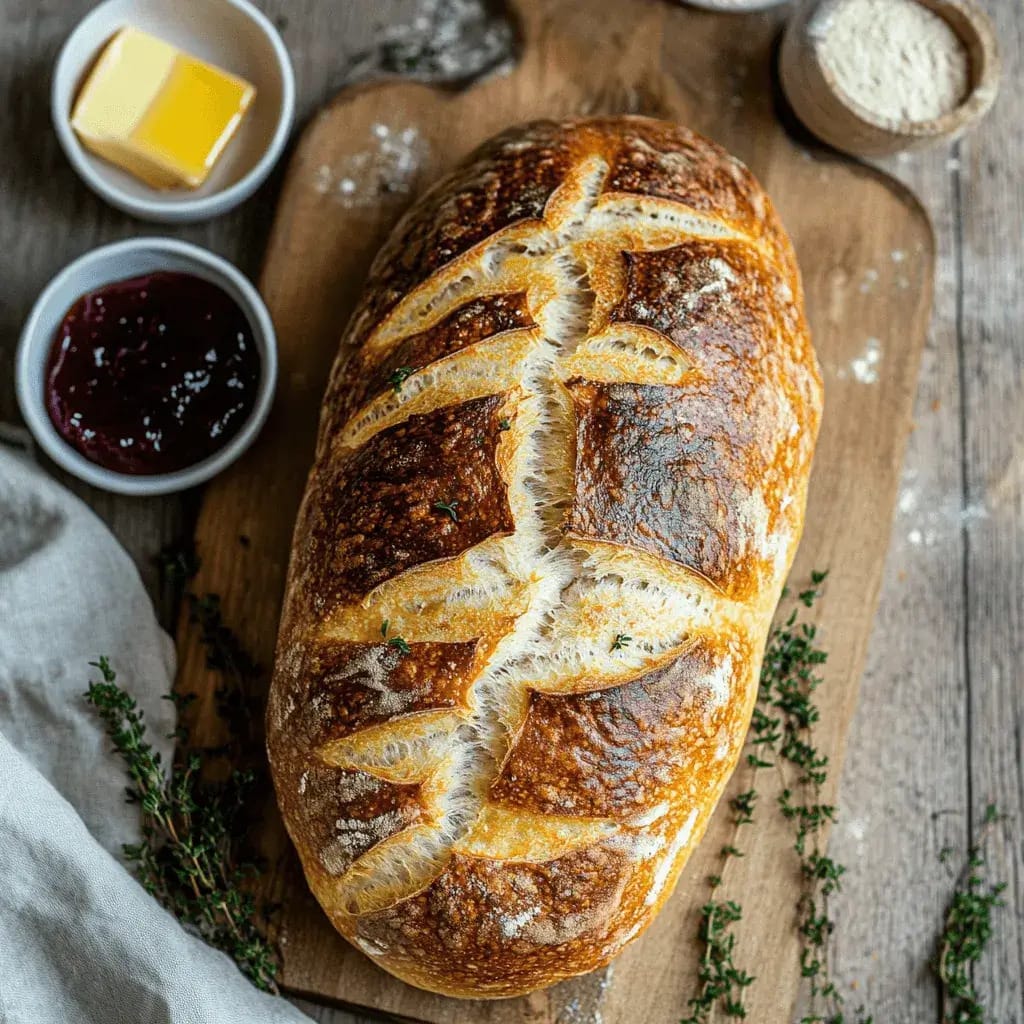
Reka bread brings people together, perfect for sharing during gatherings or enjoying with tea quietly. Its versatility makes the Reka bread recipe truly special. Whether served as a filling loaf for meals or enjoyed warm with a pat of butter, its chewy texture and gently sweet flavor make it perfect for various toppings. Over the years, each loaf tells a story reflecting the love put into its creation.
Ingredients for Reka Bread Recipe
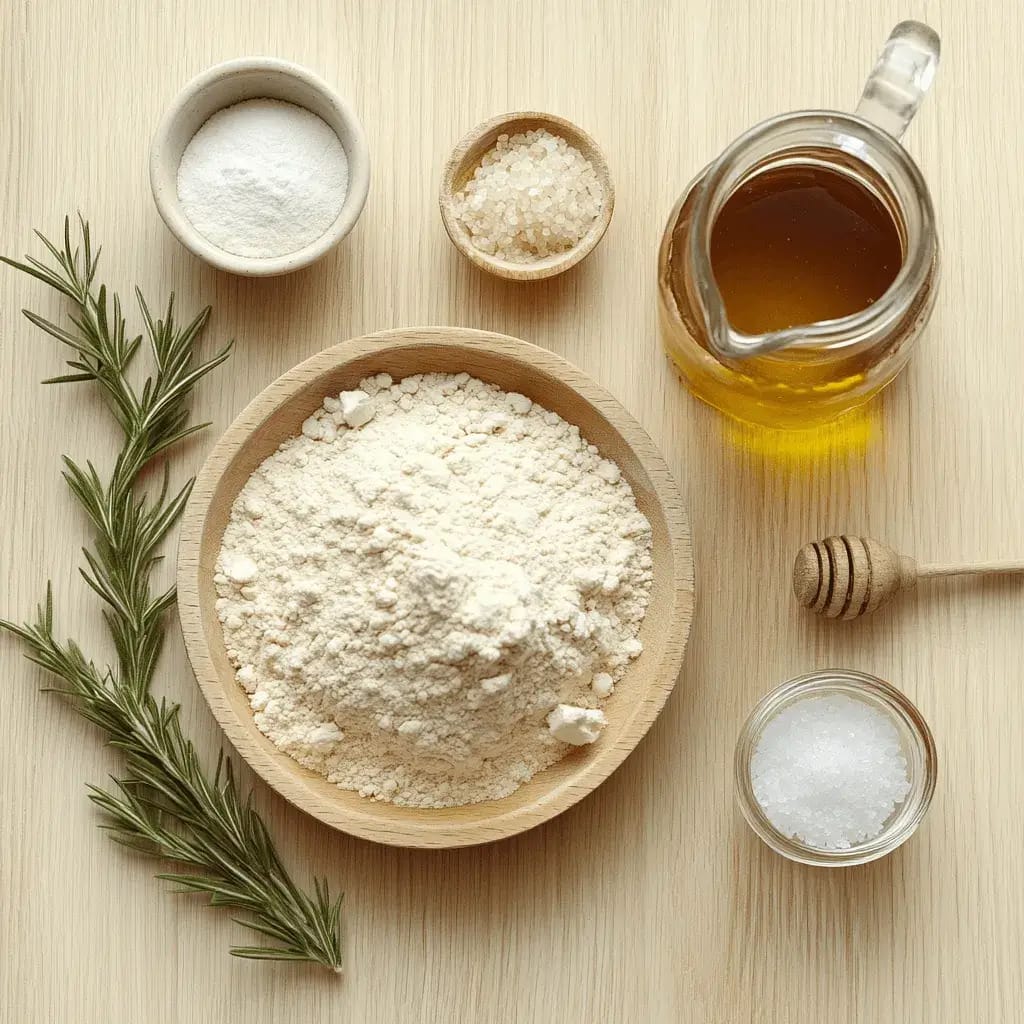
To embark on this delightful baking journey, you’ll need a handful of simple yet essential ingredients. Reka bread begins with a simple flour, water, yeast, sugar, and salt base. I often use all-purpose flour because it is available and easy to use, but whole wheat flour can add a nutty flavor I sometimes crave.
The yeast is crucial for that perfect rise; I prefer using active dry yeast because it’s reliable and easy to work with. In addition to the basics, I like to add a touch of honey or molasses for sweetness, which enhances the flavor profile beautifully. A splash of olive oil or melted butter can enrich the dough, giving it a lovely texture.
When I first experimented with adding herbs like rosemary or thyme, I was pleasantly surprised by how they elevated the bread to new heights. Each ingredient plays a vital role in creating that perfect loaf, and I encourage you to choose high-quality products for the best results.
Step-by-Step Instructions for Making Reka Bread Recipe
Making Reka bread Recipe is a straightforward process that anyone can master with patience and practice. Start by combining warm water and yeast in a bowl, letting it sit for about five minutes until it becomes frothy. This step reminds me of my early baking days when I was nervous about whether my yeast would activate.
Once you see those bubbles forming, you know you’re on the right track! Next, combine your flour, sugar, and salt in a large mixing bowl. I usually create a well in the center and pour in the yeast mixture along with any additional ingredients like honey or olive oil.
I mix everything with a wooden spoon until it forms a shaggy dough. Then comes the fun part: kneading! I love getting my hands into the dough, feeling its texture change as I knead it for about 10 minutes until it’s smooth and elastic.
After that, let it rise in a warm place until it doubles in size—this is where the magic happens!
Tips for Perfecting Your Reka Bread
| Tip | Description |
|---|---|
| Use High-Quality Flour | Choose a good quality flour for better texture and taste. |
| Proper Kneading | Knead the dough thoroughly to develop gluten for a better rise. |
| Correct Proofing Time | Allow the dough to rise appropriately to achieve the desired texture. |
| Preheat the Oven | Ensure the oven is fully preheated to the correct temperature before baking. |
| Use a Baking Stone | Consider using a baking stone for a crispier crust. |
Over the years, I’ve learned a few tricks that can make all the difference when baking Reka bread. One of my top tips is to ensure your ingredients are at room temperature before you start. This small detail can significantly affect how well your dough rises.
Additionally, I’ve found that using a kitchen thermometer to check the water temperature can help achieve optimal yeast activation—ideally around 110°F (43°C). Another key aspect is to be mindful of your kneading technique. If you find your dough too sticky, don’t hesitate to sprinkle in a little extra flour as you knead.
However, be cautious not to overdo it; too much flour can lead to a dense loaf. Lastly, I recommend letting your bread cool completely before slicing into it. This allows the crumb to set correctly and enhances the overall texture.
Believe me, those few extra minutes of patience make all the difference.
Try These Tasty Bread Recipes
- Easy Chicken Bread Recipe
- Panera Bread Chicken Salad
- The Best Cinnamon Donut Bread
- The Ultimate Banana Bread Recipe
Variations and Additions to the Reka Bread Recipe
One of the joys of baking Reka bread Recipe is its adaptability; you can easily customize it to suit your taste preferences. For instance, I often experiment with adding seeds like sunflower or sesame for an added crunch and nutritional boost. Sometimes, I’ll fold in dried fruits such as cranberries or apricots for a sweet twist that pairs beautifully with cheese or spreads.
If you’re feeling adventurous, consider incorporating cinnamon or nutmeg into the dough for a warm flavor profile perfect for fall gatherings. Occasionally, I’ve made savory versions by adding grated cheese or sautéed onions before baking. Each variation brings something unique, making every loaf an exciting new experience.
Serving Suggestions for Reka Bread Recipe
Warm from the Oven
One of my favorite ways to enjoy Reka bread is slathered with butter while still warm from the oven. That very first bite is simply unforgettable.
Comforting Combinations
Soups and stews are the perfect companions to a slice of Reka bread. I often serve it alongside a hearty vegetable soup during chilly evenings when comfort food is necessary.
Brunch Delights
I love slicing Reka bread into thick pieces for brunch gatherings and toasting them lightly before topping them with avocado and poached eggs. The combination of flavors is divine! Additionally, if you have any leftovers (which is rare in my household), they make fantastic sandwiches or can be transformed into delicious French toast for breakfast the next day.
Common Mistakes To Avoid And Their Solutions
As with any recipe, there are common pitfalls when making Reka bread. One mistake I made early on was not allowing enough time for the dough to rise correctly. It’s tempting to rush through this step when you’re eager to eat fresh bread, but patience is key.
If your dough doesn’t rise as expected, place it in a warmer area or cover it with a damp cloth to create humidity. Another issue can arise from over-kneading the dough, leading to a tough texture rather than the desired softness. If this happens, there’s no need to worry.
Allow your dough to rest for a few minutes before continuing; this will help relax the gluten strands. Remember, baking is as much about learning from mistakes as following recipes.
Testimonials and Reviews of the Reka Bread Recipe
I gave my Reka bread recipe to friends and relatives over time. They had very good things to say about it. One friend said she had never baked bread before, but felt able after trying this recipe; it was her first success. Hearing her excitement reminded me of my early baking days and how rewarding it is to create something from scratch.
Another friend loved trying different variations and even had a small event where everyone brought unique Reka bread twists. Seeing how this simple recipe sparked creativity and connection among friends made me happy. The joy of sharing food is great, and knowing my recipe played a part in those moments makes every loaf worth baking.
Conclusion
The Amazing Reka Bread Recipe is a reliable and delightful option for novice and experienced bakers. Its simplicity, rich flavors, and satisfying texture make it a staple. Whether preparing it for a family gathering, a cozy dinner at home, or to enjoy with morning coffee, this recipe impresses. The beauty of Reka bread lies not only in taste but also in versatility. You can customize by adding herbs, seeds, or dried fruits to suit personal preferences.
This adaptability ensures creating a unique loaf while adhering to fundamental principles. As you begin baking with this recipe, remember that practice makes perfect. Don’t be discouraged by setbacks, every loaf provides an opportunity to learn and improve skills. With each attempt, you’ll gain confidence and a deeper appreciation for breadmaking.
FAQs
What is the Reka Bread Recipe?
Reka Bread is a traditional Eastern European bread recipe. It’s celebrated for its light, airy texture, subtle sweetness, and stunning golden crust.
What are the ingredients for the Reka Bread Recipe?
The ingredients for the Reka Bread recipe typically include flour, sugar, yeast, salt, milk, butter, and eggs. You can also enhance the recipe by adding ingredients like raisins or nuts.
What are the step-by-step instructions for making the Reka Bread Recipe?
The step-by-step instructions for making the Reka Bread recipe involve mixing the ingredients, kneading the dough, allowing it to rise, shaping it, and baking it until golden brown. The specific instructions may vary slightly depending on the recipe.
What are some tips for perfecting your Reka Bread?
Some tips for perfecting your Reka Bread include using fresh ingredients, ensuring the dough is properly kneaded and risen, and baking at the correct temperature for the right time.
What are some variations and additions to the Reka Bread recipe?
Some variations and additions to the Reka Bread recipe include adding dried fruits, nuts, or spices to the dough, or incorporating a filling such as cinnamon sugar or cheese.
What are some serving suggestions for Reka Bread?
Reka Bread can be served warm with butter, jam, or honey. It can also be used to make sandwiches or enjoyed as a snack or breakfast item.
What common mistakes should you avoid when making the Reka Bread recipe, and what are their solutions?
Common mistakes when making the Reka Bread recipe include using expired yeast, not allowing the dough to rise sufficiently, or overbaking. Solutions include using fresh ingredients, following the rising times specified in the recipe, and monitoring the bread closely while baking.
Are there any testimonials and reviews of the Reka Bread recipe?
Testimonials and reviews of the Reka Bread recipe often praise its delicious flavor, soft texture, and ease of preparation. Many people also appreciate its versatility and the ability to customize it with different additions and variations.
The recipe📖

Amazing Reka Bread Recipe
Ingredients
- 4 cups all-purpose flour You can substitute half with whole wheat
- 1 ½ cups warm water Around 110°F (43°C) for activating yeast
- 2 ¼ teaspoons active dry yeast Equals one standard packet
- 2 tablespoons sugar White sugar or substitute with coconut sugar
- 1 ½ teaspoons salt Fine sea salt preferred
- 2 tablespoons olive oil Or melted unsalted butter
- 1 tablespoon honey or molasses Optional, enhances flavor
- 1 teaspoon dried rosemary or thyme Optional, adds herbal aroma
Instructions
- In a bowl, combine warm water and active dry yeast. Let it sit for 5–10 minutes until it becomes foamy.
- In a large mixing bowl, whisk together the flour, sugar, and salt.
- Create a well in the center and pour in the yeast mixture, olive oil, and honey or molasses.
- Mix everything with a wooden spoon until a shaggy dough forms.
- Transfer the dough onto a lightly floured surface and knead for 8–10 minutes until smooth and elastic.
- Place the dough in a greased bowl, cover with a damp cloth or plastic wrap, and let it rise in a warm place for 1–1.5 hours, or until doubled in size.
- Punch down the dough, shape it into a loaf, and place it in a greased baking pan or on a baking sheet.
- Cover loosely and let it rise again for 30–45 minutes.
- Preheat your oven to 375°F (190°C).
- Bake the bread for 30–35 minutes or until the top is golden brown and the loaf sounds hollow when tapped.
- Let the bread cool on a wire rack before slicing.
1 thought on “Amazing Reka Bread Recipe That Never Fails”