
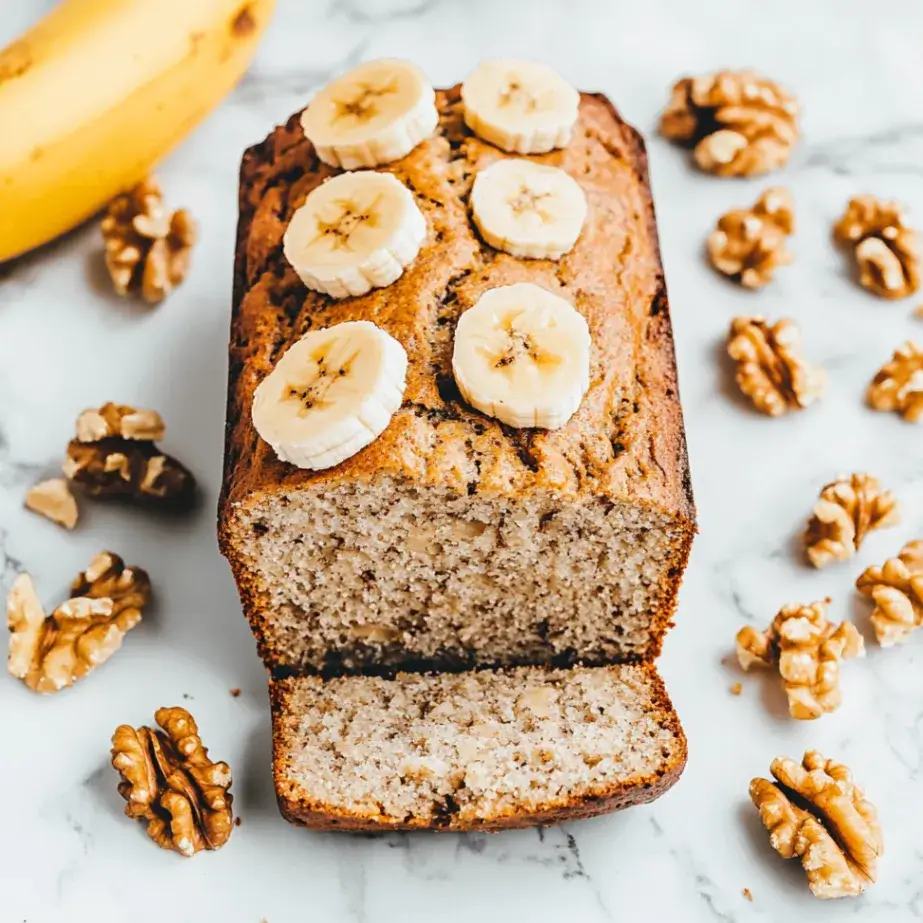
If you enjoy baking, you have likely made banana bread with nuts. But have you tried making it with sourdough? The sourdough banana nut bread recipe has a unique flavor and texture from the sourdough fermentation process. It’s a tasty twist on traditional banana bread. This recipe works well if you have overripe bananas or want to use your sourdough starter. It’s great for bakers at any skill level.
Jump to
- Choosing the Right Ingredients for Sourdough Banana Nut Bread Recipe
- Creating and Maintaining a Sourdough Starter
- Incorporating Ripe Bananas into the Sourdough Bread Recipe
- Adding Nutty Flavors to Enhance the Bread’s Taste
- Mixing and Kneading the Sourdough Banana Nut Bread Dough
- Proofing and Baking the Bread for Optimal Results
- Tips for Storing and Enjoying Sourdough Banana Nut Bread Recipe
- 5 Common Mistakes To Avoid And Their Solutions
- Conclusion
- FAQs
- Other recipes you may like to try:
This blog post will show you how to make a homemade sourdough banana nut bread recipe. We’ll cover the ingredients and baking steps so you end up with a moist, flavorful loaf. Your family and friends will be impressed. Get your mixing bowl ready for this fun baking project.
Choosing the Right Ingredients for Sourdough Banana Nut Bread Recipe
Choosing the Perfect Bananas
When making a sourdough banana nut bread recipe, selecting high-quality ingredients ensures the best flavor and texture. Start with ripe, sweet, and soft bananas, as they will add natural sweetness and moisture to the bread.
The Importance of a Robust Sourdough Starter
Additionally, opt for a robust, well-fed, and active sourdough starter, as this will contribute to a good rise and flavor development in the bread.
Selecting the Ideal Nuts
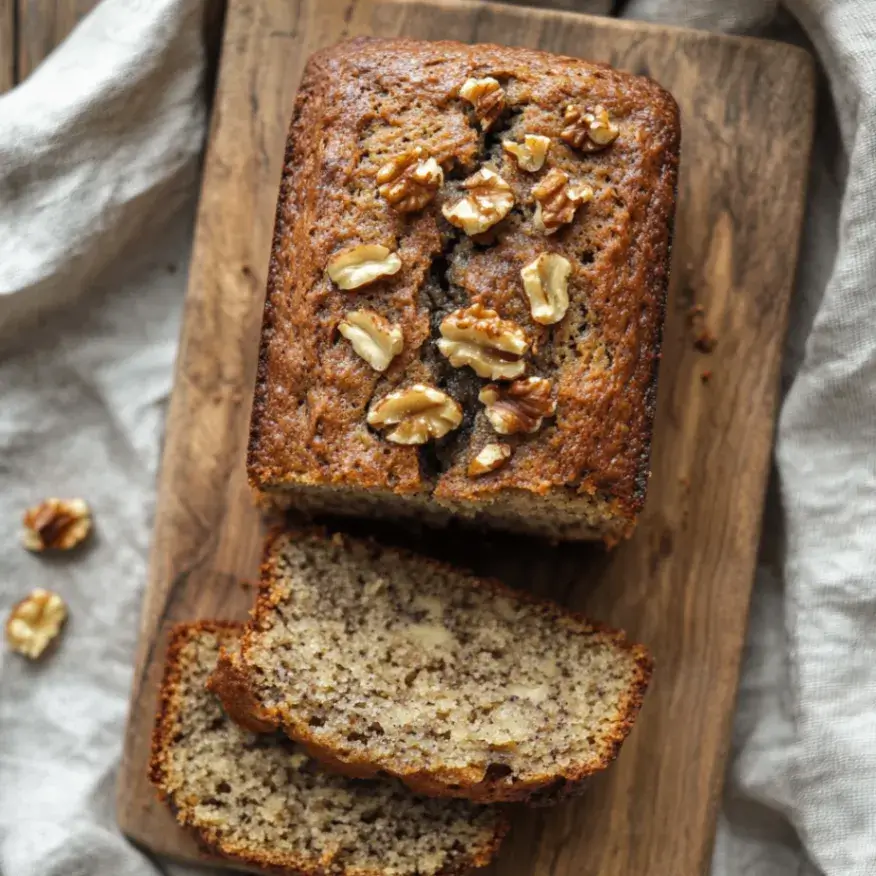
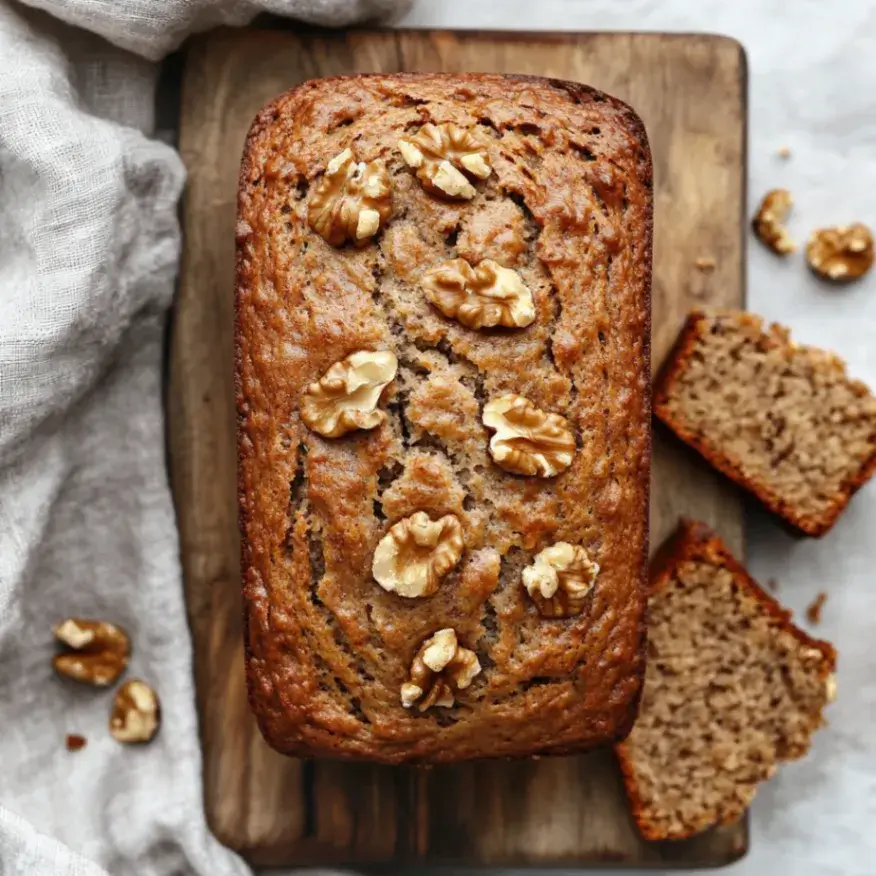
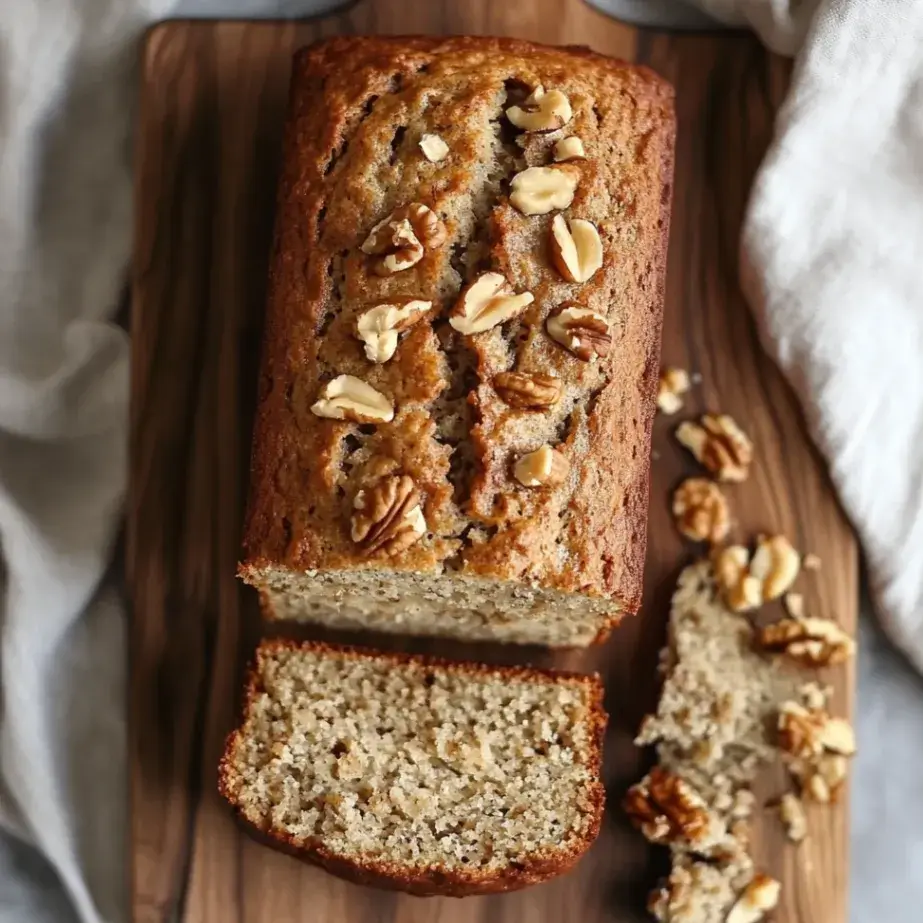
Consider using walnuts or pecans for the nuts. Their rich, earthy flavors complement the sweetness of the bananas and the tanginess of the sourdough.
Creating and Maintaining a Sourdough Starter
To create a sourdough starter, mix equal parts of flour and water in a clean container and allow it to ferment at room temperature. Feed the starter regularly with fresh flour and water to keep it active and bubbly. Maintaining a sourdough starter involves regular feeding and proper storage to ensure its longevity and effectiveness in leavening the bread.
A well-maintained starter will contribute to flavor, texture, and rise in the sourdough banana nut bread recipe.
Incorporating Ripe Bananas into the Sourdough Bread Recipe
| Metrics | Results |
|---|---|
| Increased Moisture | Improved texture and softness |
| Nutritional Value | Added potassium, fiber, and vitamins |
| Flavor Enhancement | Subtle sweetness and aroma |
| Extended Shelf Life | Delayed staling and improved freshness |
Ripe bananas are a key ingredient in sourdough banana nut bread, providing natural sweetness and moisture to the dough. Mash the bananas thoroughly before incorporating them into the bread dough to ensure an even flavor and texture distribution. The bananas add a subtle fruity aroma and a tender crumb to the finished bread.
When selecting bananas for this recipe, choose those with brown speckles on the skin, indicating optimal ripeness for baking.
Adding Nutty Flavors to Enhance the Bread’s Taste
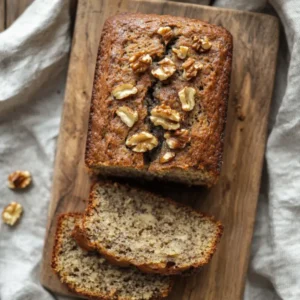
Nuts are a delightful addition to the sourdough banana nut bread recipe, offering a satisfying crunch and rich, toasty flavors. To incorporate nuts into the bread, chop them into small pieces and fold them into the dough during the final mixing stages. The nuts will provide texture and infuse the bread with their distinct nuttiness, complementing the sweet and tangy notes of the sourdough and bananas.
Mixing and Kneading the Sourdough Banana Nut Bread Dough
When mixing the sourdough banana nut bread dough, combine the ingredients gently to avoid overworking the gluten, which can result in a dense loaf. Knead the dough until it becomes smooth and elastic, allowing it to develop structure and strength for a good rise during baking. Incorporating ripe bananas and nuts should be thorough but gentle to maintain an even distribution of flavors and textures throughout the dough.
Proofing and Baking the Bread for Optimal Results
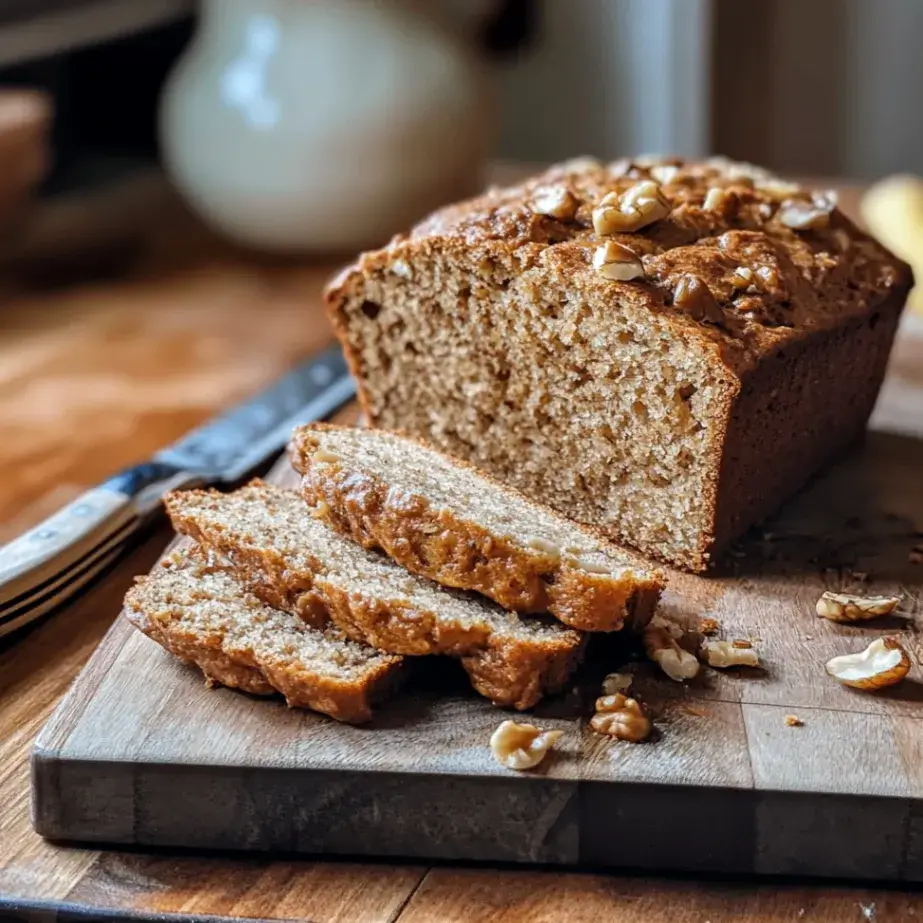
After shaping the sourdough banana nut bread dough, allow it to be proven in a warm, draft-free environment until it has doubled. This step is crucial for developing flavor and achieving an airy crumb in the finished bread. When baking, preheat the oven to the recommended temperature and place a pan of hot water on the lower rack to create steam, which helps develop a crisp crust.
As the aroma of freshly baked bread fills the kitchen, anticipation builds with each passing minute. The loaf, nestled snugly in the oven, gradually transforms into a masterpiece of golden brown perfection. The crust’s delicate balance of crispness and warmth beckons with its inviting hue. With a gentle tap on the bottom, a satisfying hollow sound resonates, confirming that the bread has reached its ideal state. It’s a symphony of senses—sight, smell, and sound—all harmonizing to signal that this labor of love is ready to be savored.
Tips for Storing and Enjoying Sourdough Banana Nut Bread Recipe
Patience is essential to savor the exquisite flavors of your freshly baked sourdough banana nut bread recipe. As the loaf cools, its tantalizing aroma dances through the kitchen, promising a taste as delightful as its scent. Once cooled, wrap it lovingly in plastic or nestle it into an airtight container to preserve its moist texture and rich taste for up to three days at room temperature. Freezing offers a perfect solution for those who wish to extend this culinary pleasure. When the urge arises for a slice of this delectable treat, thaw and toast it to golden perfection. A lavish spread of butter or cream cheese transforms each bite into a moment of pure indulgence, making it an ideal companion for any time of day.
How to Store Bread Properly–This link provides expert tips on keeping homemade bread fresh longer.
5 Common Mistakes To Avoid And Their Solutions
1. Overripe Bananas: Overly ripe bananas can produce an overly moist or dense bread. Solution: Use ripe but not overly ripe bananas for optimal texture and flavor.
2. Inactive Starter: A weak or inactive sourdough starter can lead to poor rise and lackluster flavor in the bread. Solution: Ensure your starter is active and well-fed before incorporating it into the recipe.
3. Overmixing: Overmixing the dough can lead to tough bread with a dense crumb.
Solution: Mix and gently knead the dough until combined to avoid overworking the gluten.
4. Underproofing: Insufficient proofing time can result in a dense loaf with underdeveloped flavor. Solution: Allow the dough to be proven until it has doubled before baking.
5. Improper Storage: Storing the bread improperly can lead to premature staling or spoilage. Solution: Store the bread in an airtight container or freeze it for a longer shelf life.
By understanding the basics of sourdough bread, selecting high-quality ingredients, maintaining a healthy sourdough starter, incorporating ripe bananas and nutty flavors, mastering mixing and kneading techniques, proper proofing and baking methods, and storing tips, you can create delicious sourdough banana nut bread recipe at home while avoiding common mistakes for optimal results.
Conclusion
Baking a sourdough banana nut bread recipe at home is rewarding and a nice way to use your sourdough starter. This twist on classic banana bread blends sourdough tang with sweet, ripe bananas and crunchy nuts. The result is a moist, flavorful loaf ideal for breakfast snacks or desserts.
Follow the steps in this blog post to create a tasty loaf that showcases your baking abilities. It’s a comforting treat for you and your loved ones. Baking involves experimentation as much as following recipes.
FAQs
What is sourdough bread?
Sourdough bread is crafted from dough that undergoes natural fermentation with wild yeast and lactobacilli bacteria. This fermentation process gives sourdough bread its characteristic tangy flavor and chewy texture.
What are the essential ingredients for making a sourdough banana nut bread recipe?
The ingredients for making sourdough banana nut bread include sourdough starter, ripe bananas, flour, sugar, eggs, butter, salt, baking soda, and chopped nuts such as walnuts or pecans.
How do you create and maintain a sourdough starter?
To create a sourdough starter, mix equal parts of flour and water in a jar and let it sit at room temperature. Then, feed it regularly with more flour and water. To maintain the starter, continue feeding it regularly and storing it in the refrigerator when not in use.
How do you incorporate ripe bananas into the sourdough bread recipe?
To incorporate ripe bananas into the sourdough bread recipe, mash the bananas and mix them into the dough during the mixing and kneading process.
How can you add nutty flavors to enhance the taste of the sourdough banana nut bread recipe?
You can add nutty flavors to sourdough banana nut bread by incorporating chopped nuts such as walnuts or pecans into the dough before baking.
What is the process for mixing and kneading the sourdough banana nut bread recipe dough?
Mix the sourdough starter, mashed bananas, flour, sugar, eggs, butter, salt, and baking soda together, then knead the dough until it is smooth and elastic.
How do you proof and bake the sourdough banana nut bread recipe for optimal results?
After kneading, let the dough proof in a warm place until it doubles. Then, shape it into a loaf and let it proof again before baking it in a preheated oven until golden brown.
What are some tips for storing and enjoying sourdough banana nut bread?
To store sourdough banana nut bread, wrap it tightly in plastic wrap or aluminum foil and store it at room temperature for up to 3 days, or freeze it for more extended storage. Enjoy the bread sliced and toasted with butter or jam.
What are 5 common mistakes to avoid when making sourdough banana nut bread, and their solutions?
1. Overproofing the dough: To avoid overproofing, monitor the dough closely and bake it when it has doubled. 2. Using an inactive sourdough starter: Ensure it is active and bubbly before using it in the recipe. 3. Adding too many nuts: Use the recommended amount to avoid making the bread too dense. 4. Not allowing the bread to cool before slicing: Let it cool completely to prevent it from becoming gummy. 5. Storing the bread improperly: Store it in airtight packaging to maintain its freshness.
Other recipes you may like to try:
- San Francisco Sourdough Bread Recipe for Beginners
- Amish Cinnamon Bread Recipes: 5 Simple Steps to Perfection
- Banana Bread Recipe For High Altitudes
- The Best Crawfish Bread Recipe
Sourdough Banana Nut Bread Recipe
Equipment
- Mixing bowl
- Measuring cups & spoons
- Fork or potato masher
- Whisk or spoon
- Hand mixer or stand mixer (optional)
- 9×5-inch loaf pan
- Oven
- Cooling rack
Ingredients
- 1 ½ cups all-purpose flour Standard flour for baking.
- 1 teaspoon baking soda Helps the bread rise.
- ½ teaspoon salt Enhances flavor.
- 1 cup sourdough starter Use an active, well-fed starter for best results.
- 3 ripe bananas Must be well-ripened for best sweetness and moisture.
- 2 large eggs
- ½ cup sugar Brown sugar can be used for a richer flavor.
- ½ cup unsalted butter Softened, not melted, for better mixing.
- 1 teaspoon vanilla extract Adds a lovely aroma.
- 1 cup chopped walnuts or pecans Optional, adds texture and flavor.
Instructions
- Preheat your oven to 350°F (175°C) and grease a 9×5-inch loaf pan or line it with parchment paper.
- In a large mixing bowl, combine the flour, baking soda, and salt. Set aside.
- In another bowl, cream the softened butter and sugar together until light and fluffy. Add the eggs, one at a time, mixing well after each addition.
- Stir in the mashed bananas and vanilla extract.
- Gradually add the sourdough starter to the wet ingredients, mixing until fully incorporated.
- Slowly fold in the dry ingredients, being careful not to overmix. Gently stir in the chopped nuts.
- Pour the batter into the prepared loaf pan and spread it evenly.
- Bake for 50–60 minutes, or until a toothpick inserted into the center of the bread comes out clean.
- Remove the bread from the oven and let it cool in the pan for 10 minutes. Then, transfer it to a cooling rack to cool completely.
- Slice and enjoy! Optionally, serve with butter or cream cheese for an added touch of indulgence.