
If you have strolled through San Francisco’s streets, you may have smelled the city’s iconic bread: sourdough. Known for its tangy taste, chewy crust, and airy texture, San Francisco’s sourdough bread recipe is a beloved staple. But you can make this artisanal delight at home. It’s possible and rewarding for beginners.
This guide will teach you how to craft your San Francisco sourdough bread recipe. We’ll cover understanding the importance of the sourdough starter in mastering fermentation. Whether you are a novice baker or expanding your skills, you’ll learn everything needed to achieve the perfect loaf. Get ready to dive into sourdough baking! Here’s a simple yet effective recipe to create a delicious loaf reminiscent of San Francisco’s. Let’s begin!
Jump to
- Ingredients and Equipment Needed for San Francisco Sourdough Bread Recipe
- Creating and Maintaining a Sourdough Starter
- The Fermentation Process and Its Importance in San Francisco Sourdough Bread Recipe
- Kneading and Shaping the Sourdough Bread Dough
- Baking and Caring for Your Sourdough Bread
- Troubleshooting Common Issues in San Francisco Sourdough Bread Recipe
- Tips and Tricks for Perfecting Your San Francisco Sourdough Bread Recipe
- Conclusion
- FAQs
- Other Recipes You’ll Love
Ingredients and Equipment Needed for San Francisco Sourdough Bread Recipe
Quality Ingredients
First and foremost, high-quality flour is crucial. I often use bread flour for its higher protein content, which helps develop gluten and gives the bread its structure. You’ll also need water—preferably filtered or bottled—to avoid any chlorine that might hinder yeast activity. Salt is another key ingredient; it enhances flavor and strengthens the dough.
Essential Equipment
Equipment such as a sturdy mixing bowl, a bench scraper, and a kitchen scale are indispensable. I can’t stress enough how much a kitchen scale has improved my baking precision.
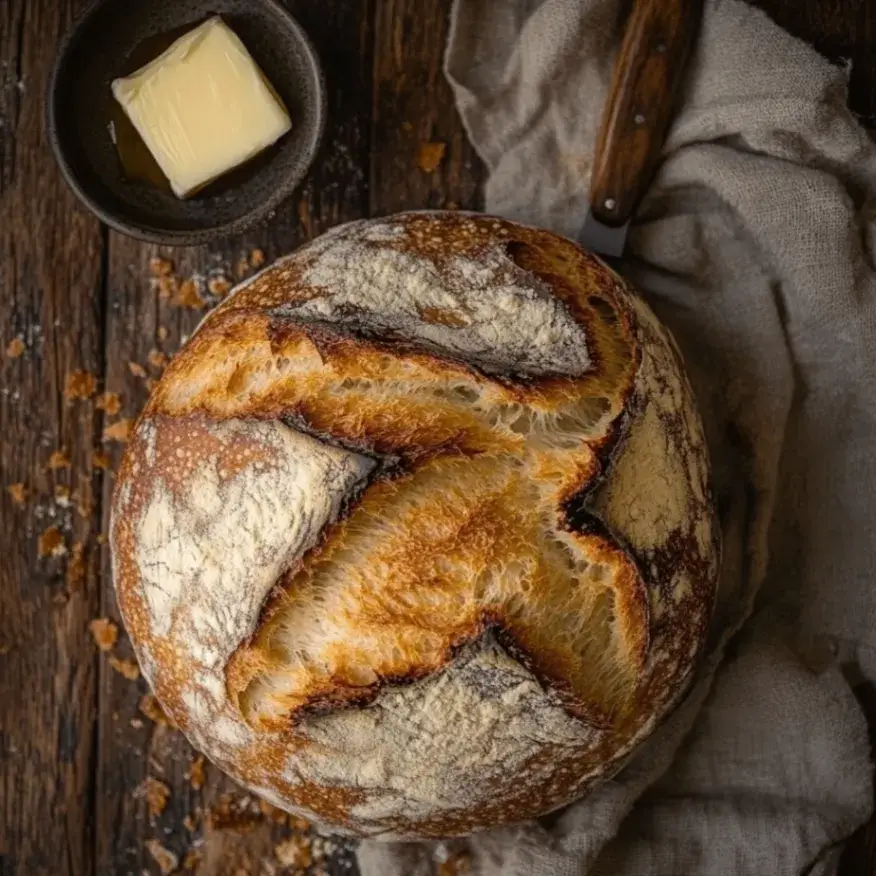
Achieving the Perfect Crust for San Francisco Sourdough Bread Recipe
It’s also helpful to have a Dutch oven or a baking stone for that perfect crust. When I first started baking sourdough, I used a simple baking sheet, but once I invested in a Dutch oven, the results were night and day. The steam inside the pot helps achieve that beautiful crust we crave.
Creating and Maintaining a Sourdough Starter
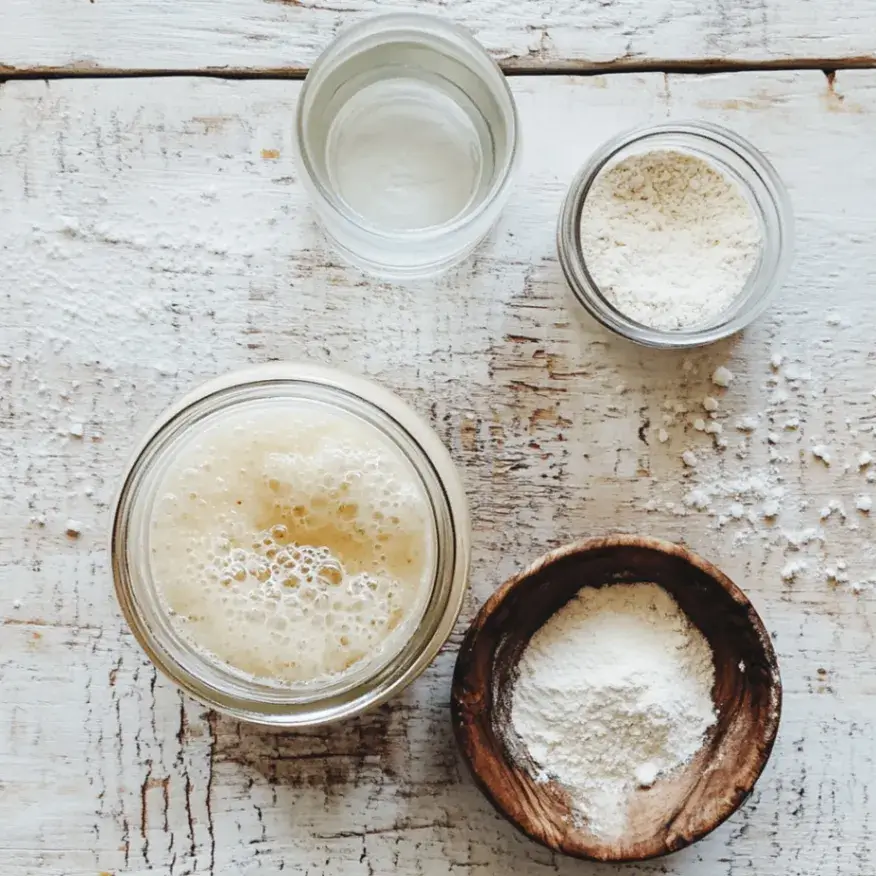
The heart of any sourdough bread is its starter—a living culture of flour and water that captures wild yeast and bacteria. Creating your own starter is an exciting process requiring flour and water. I remember my first attempt vividly; I mixed equal parts of both in a jar and set it on my kitchen counter, eagerly checking it daily for signs of life.
It took about five days for my starter to bubble up and develop that delightful tangy aroma. I’ve learned that regular feedings—typically once every 24 hours—keep it healthy and active.
If you’re not ready to bake every day, you can store it in the fridge and feed it once a week. Just be sure to bring it back to room temperature and give it a good feeding before you plan to bake. This nurturing aspect of sourdough has become a ritual for me; there’s something incredibly satisfying about caring for this little culture that will eventually transform into a delicious San Francisco sourdough bread recipe.
The Fermentation Process and Its Importance in San Francisco Sourdough Bread Recipe
| Stage | Duration | Temperature | Importance |
|---|---|---|---|
| Mixing | 10 minutes | Room temperature | Allows for hydration of flour and initial gluten development |
| Autolyse | 30-60 minutes | Room temperature | Improves dough extensibility and fermentation process |
| Fermentation | 12-16 hours | Room temperature | Develops flavor, improves texture, and increases digestibility |
| Folding | Every 30 minutes for 2-3 hours | Room temperature | Strengthens dough structure and redistributes yeast and bacteria |
| Proofing | 2-4 hours | Room temperature | Allows dough to rise and develop final flavor and texture |
Fermentation is where the magic happens in sourdough bread making. This process allows the wild yeast in your starter to ferment the sugars in the dough, producing carbon dioxide gas that causes the bread to rise. I remember the first time I witnessed this transformation; after mixing my ingredients, I let the dough rest for several hours, and when I returned, it doubled in size!
The sight was exhilarating and made me appreciate the science behind baking. The fermentation process also contributes to the flavor profile of your bread. Longer fermentation times allow more complex flavors to develop, so many bakers opt for an overnight rise.
I’ve experimented with different fermentation times and found that a longer bulk fermentation often yields a more flavorful loaf. It’s fascinating how patience can lead to such delicious San Francisco sourdough bread recipe; each time I bake, I’m reminded of the importance of allowing nature to take its course.
Kneading and Shaping the Sourdough Bread Dough
Once your dough has fermented adequately, it’s time to knead and shape it. Kneading helps to develop gluten, giving the bread structure and chewiness. Initially, I was intimidated by this step; however, I soon discovered that kneading doesn’t have to be a strenuous task.
Using the “stretch and fold” technique has become my go-to method. It’s gentle yet effective, allowing me to build strength in the dough without overworking it. Shaping the dough is another crucial step to make or break your loaf.
After kneading, I gently shape my dough into a round or oval form, depending on my baking vessel. The first time I shaped my dough, I was surprised at how satisfying it felt to create that smooth surface. It’s like wrapping up a little gift that will soon become delicious!
With practice, I’ve learned to recognize when my dough is properly shaped—a certain tension feels just right.
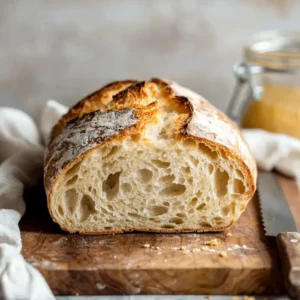
Baking and Caring for Your Sourdough Bread
The Moment of Truth
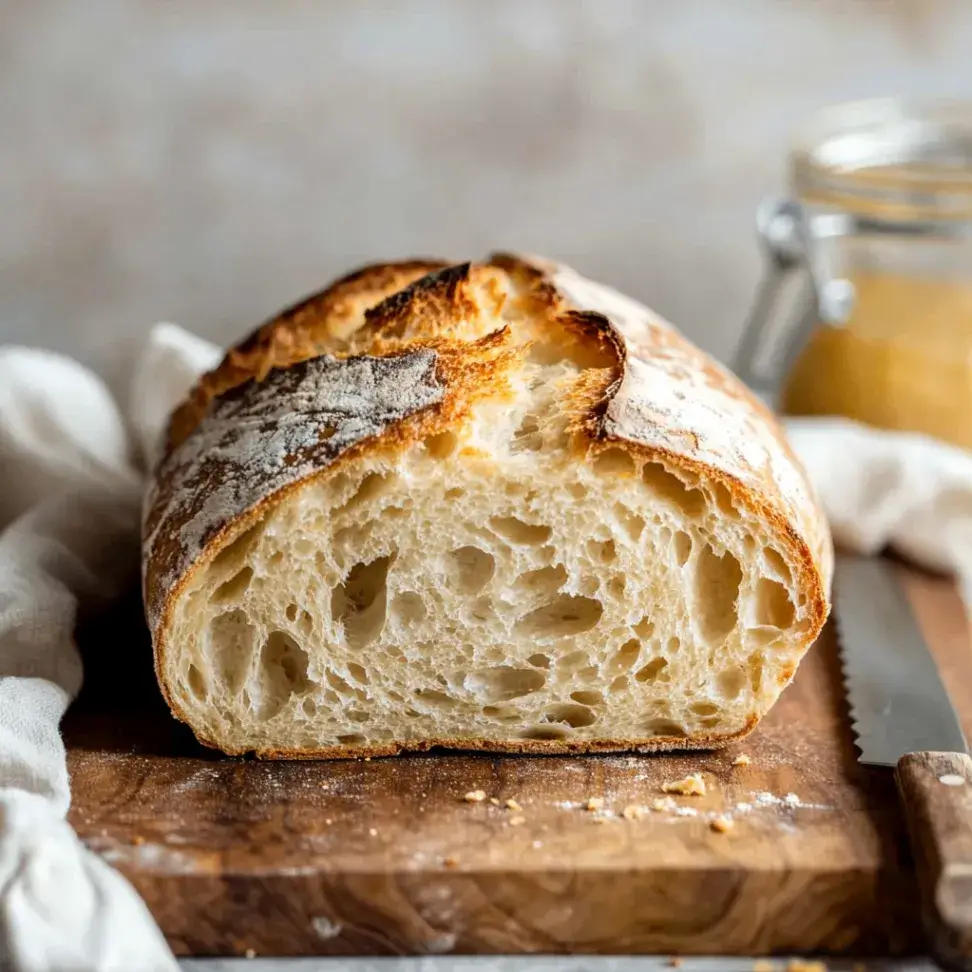
The moment I opened the lid halfway through baking to reveal a beautifully risen loaf was pure joy. After baking, it’s essential to let your bread cool completely before slicing it. This waiting period can feel torturous, but I’ve learned that patience pays off in flavor and texture.
Enjoying the Fruits of Your Labor
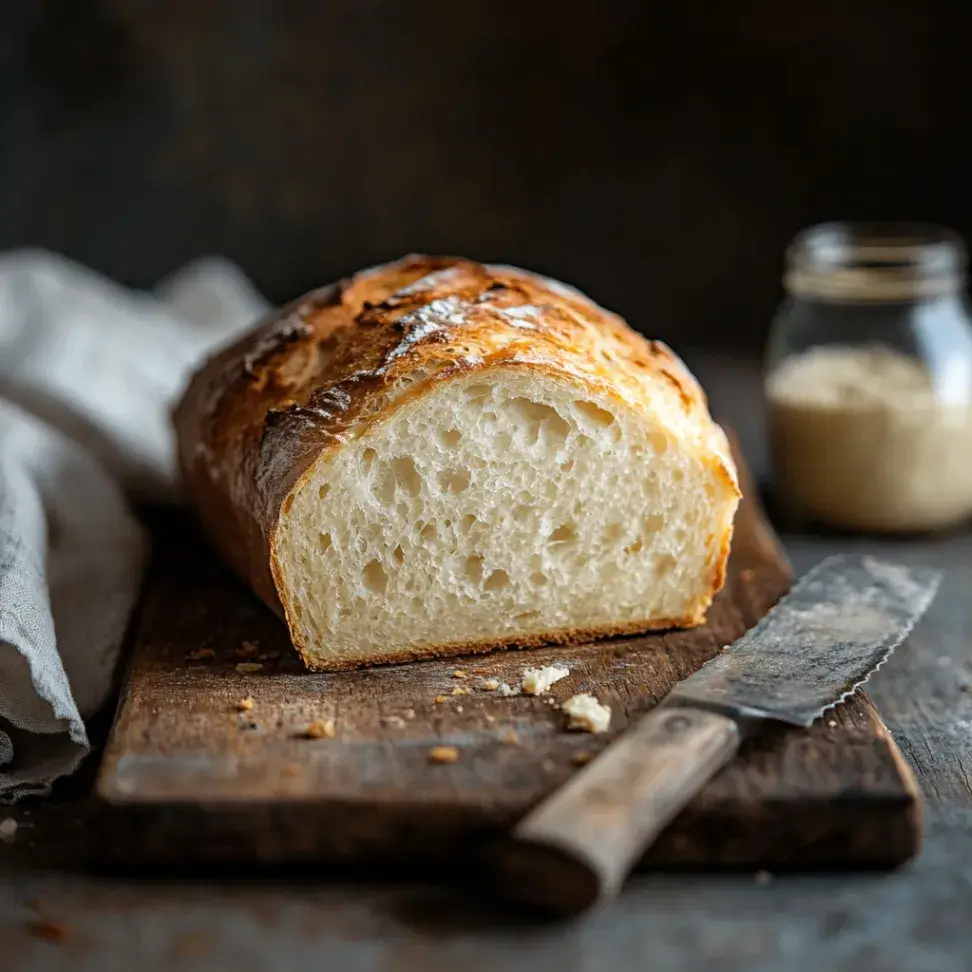
Once it has cooled, I love to slice it into my loaf and enjoy it with butter or as a sandwich. There is something special about taking that first bite, knowing that all your hard work has paid off.
Preserving the Perfection
Caring for your sourdough doesn’t end with baking; storing it properly ensures you can enjoy it for days. A simple paper bag or cloth wrap keeps it fresh without trapping moisture.
Troubleshooting Common Issues in San Francisco Sourdough Bread Recipe
Sourdough baking has its difficulties. Early on, I had a problem with dense bread. My loaves were heavy instead of light and airy. After researching and trying different things, I found insufficient fermentation was often the cause. Giving my dough enough time to rise made a big difference in getting that perfect crumb. Many beginners also have an issue over-proofing their Dough, which can lead to flat loaves. I remember one bake where my dough had risen nicely but collapsed when I tried to shape it.
Now, I watch my dough closely during fermentation. Using the “poke test” has become my way to check if it’s ready. If the indentation springs back slowly but doesn’t disappear completely, it’s time to bake.
This page provides expert tips on common sourdough baking problems, including dense loaves, over-proofing, and fermentation issues: Sourdough Troubleshooting Guide.
Tips and Tricks for Perfecting Your San Francisco Sourdough Bread Recipe
Over time, I’ve gathered several tips that have helped refine my sourdough skills. One of my favorite tricks is using a kitchen thermometer to check the internal temperature of my bread while baking; aiming for around 200°F ensures that it’s fully cooked without being overdone. Additionally, experimenting with different types of flour has opened up new flavor profiles for me—adding whole wheat or rye flour can create depth in taste.
Another invaluable tip is to keep a baking journal where I document each bake’s details—ingredients used, fermentation times, and outcomes. This practice has helped me identify patterns in my baking successes and failures over time. Lastly, don’t be afraid to embrace imperfection!
Each loaf teaches me something new about sourdough baking, reminding me that even if things don’t go as planned, there’s always room for improvement in future bakes. In conclusion, making a San Francisco sourdough bread recipe is an enriching experience filled with learning opportunities and delicious rewards. With practice and patience, anyone can create their own version of this beloved bread at home.
Conclusion
Baking San Francisco sourdough bread recipe at home is a fun cooking activity and a great way to connect with the city’s rich baking history. By following the steps in this guide, even beginners can make bread with the perfect crust & tangy flavor that sourdough fans love. The key is patience. Letting the dough ferment and rise properly will give the best results. As you start making sourdough, don’t be afraid to try different amounts of water, other types of flour & different fermentation times. Each loaf teaches you something new about the process and helps improve your technique. You’ll better understand how to adjust the dough to get your desired taste with practice.

FAQs
What is the San Francisco Sourdough Bread Recipe?
San Francisco Sourdough Bread recipe is a sourdough bread known for its tangy flavor and chewy texture. It uses a sourdough starter, a natural leavening agent from flour and water.
What ingredients and equipment are needed to make San Francisco Sourdough Bread Recipe?
To make the San Francisco Sourdough Bread Recipe, you will need flour, water, salt, and a sourdough starter. You will also need a mixing bowl, a kitchen scale, a dough scraper, a Dutch oven or baking stone, and a kitchen thermometer.
What are the step-by-step instructions for making the sourdough starter?
To make the sourdough starter, mix flour and water in a jar and let it ferment at room temperature for several days, feeding it regularly with more flour and water. The detailed step-by-step instructions can be found in the article.
How do you feed and maintain the sourdough starter?
To feed and maintain the sourdough starter, discard a portion and feed the remaining starter with fresh flour and water. This process should be done regularly to keep the starter healthy and active.
What is the process for mixing and kneading the dough?
After the sourdough starter is ready, mix it with flour, water, and salt to form a dough. Knead the dough until it is smooth and elastic, which helps develop the gluten.
How do you proof and bake the sourdough bread?
After the dough is kneaded, it must be proofed or raised before being shaped and baked. Proofing can take several hours, depending on the environment’s temperature. The shaped dough is then baked in a preheated oven until it is golden brown and crusty.
What are some tips and troubleshooting advice for beginners making San Francisco Sourdough Bread Recipe?
Some tips for beginners include using a kitchen scale to measure ingredients accurately, maintaining a consistent feeding schedule for the sourdough starter, and paying attention to the dough’s texture and appearance during the mixing and kneading. Troubleshooting advice includes adjusting the proofing time and temperature and experimenting with different baking methods to achieve the desired crust and crumb.
Other Recipes You’ll Love
- Amish Cinnamon Bread
- Banana Bread Recipe For High Altitudes
- Crawfish Bread
- Cabbage Bread
- Cracklin Bread
San Francisco Sourdough Bread Recipe
Ingredients
For the Sourdough Starter:
- 1/2 cup Whole wheat flour
- 1/2 cup Filtered water
For the Dough:
- 3 1/2 cups Bread flour Provides structure and chew
- 1 1/4 cups Filtered water Essential for hydration
- 1/2 cup Active sourdough starter Fed and bubbly
- 2 tsp Salt
Instructions
Make the Sourdough Starter:
- Mix 1/2 cup whole wheat flour and 1/2 cup filtered water in a jar.
- Stir well, cover with a cloth or lid, and let sit at room temperature for 5 days, feeding it with equal parts flour and water every 24 hours. Your starter should become bubbly and have a tangy aroma.
Prepare the Dough:
- In a large mixing bowl, combine 3 1/2 cups bread flour and 1 1/4 cups filtered water. Mix until fully hydrated.
- Add 1/2 cup of your active sourdough starter and 2 tsp of salt. Stir to combine.
Autolyse:
- Let the dough rest (autolyse) for 30–60 minutes at room temperature. This helps with gluten development.
Knead and Fold the Dough:
- Knead the dough by using the "stretch and fold" method every 30 minutes for 2-3 hours. This strengthens the dough without overworking it.
First Proofing:
- Cover the dough and let it rest at room temperature for 12–16 hours (overnight is ideal). The dough should rise and bubble up.
Shape the Dough:
- Turn the dough out onto a floured surface and shape it into a round or oval loaf, depending on your preferred shape and baking vessel.
Final Proofing:
- Preheat your oven to 475°F (245°C). If using a Dutch oven, place it inside the oven while preheating.
- Place the dough in a preheated Dutch oven or on a baking stone. Bake for 40-45 minutes until golden brown and a thermometer inserted in the bread reads 200°F (93°C).
- Remove the bread from the oven and let it cool completely before slicing. Patience is key—allowing the bread to cool enhances the flavor and texture.